
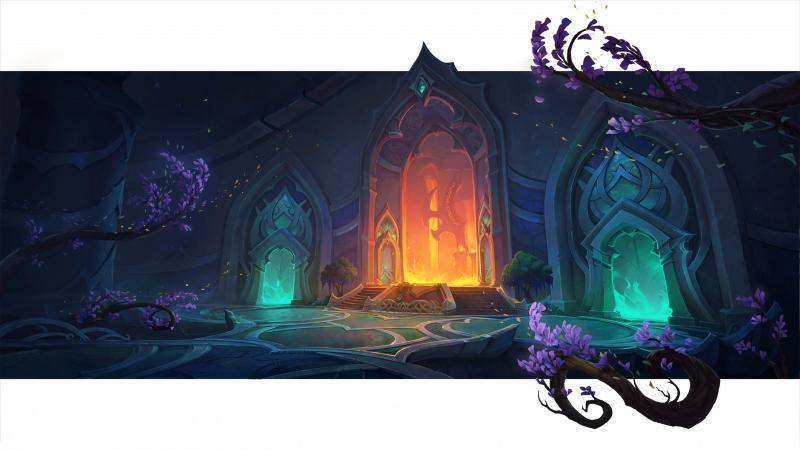
In the Amirdrassil raid, you have to protect the young world tree from the attack of Fyrakk and his flaming allies. The developers are preparing interesting battles with some unusual mechanics, and we suggest you familiarize yourself with brief tactics for all the bosses of this raid. But you can always buy WoW carry service if you don’t want to read all of this for a chance of getting something useful in the LFG raid group.
Gnarlroot
The boss has 2 alternating phases.
In the first phase, the boss summons a lot of sleeping whips, which can be activated if you blow up an AoE debuff next to them. During the transition to the second phase, the boss activates all the surviving whips himself.
In the second phase, the boss becomes invulnerable and releases roots that need to be cauterized.
To do this, you need to get into the fire zone, thereby getting a debuff, and then run up to the roots with the debuff.
After the roots are burned, the boss will start taking double damage for 20 seconds, while dealing significant pulsating damage to the raid. At the end of 20 seconds, phase 1 will start again.
Igira the Cruel
Igira has one phase.
Igira will throw spears at the players, chaining them to the ground. You can free the player only by destroying the spear.
Having accumulated 100 energy, Igira will place three different weapons on the site, offering players to choose which one she will fight with. You cannot choose the same weapon twice.
To activate the selected weapon, players must group in this place, thereby receiving damage. Igira will then use the ultimate ability associated with this weapon several times.
One of the abilities deals huge damage to the tank, which the raid must share with it (rotation is required). Those who share the damage will be stunned; the stun must be dispersed.
Other weapons create entry zones from which you need to run out; the Igira will also jump around the room, causing huge damage around the landing site.
The third weapon imposes a healing-absorbing debuff; the debuff must be removed by healing, otherwise the entire raid will take huge damage.
After all three weapons are used, Igira will fly into a rage and she needs to be finished off in time.
Volkoross
Some players will receive a debuff; they must move away from each other and from the raid.
Volkoross will occasionally carry out a fatal tail strike, as signaled by an oblong shadow on the ground.
After accumulating 100 energy, the boss summons two fire zones; the raid must absorb both zones, thus dividing into two groups.
The first two entry zones are located close to each other; the second two entry zones are located at opposite ends of the site, which means that for some time both groups will have to fight independently of each other.
After absorption, the entry zones leave behind huge pools of fire.
This mechanic is a kind of timer, because in the end the whole site will be on fire.
Council of Dreams: Urctos, Aerwynn, Pip
The council consists of three bosses: Urkta, Erwinn and Pipa. Of these three, only Urkt can be led, the other two stand still and from time to time jump to another point. You need to kill all three of them at about the same time, otherwise they will start to resurrect.
Urkt will make a dash, which one of the players must intercept, otherwise the entire raid will receive huge damage.
Erwinn will create poisonous puddles that cause significant damage if stepped in.
Pip will turn random participants of the raid into ducks. The transformed player must step into three poisonous puddles to activate the button that allows him to return to his original appearance.
After accumulating 100 energy, each opponent will use an ultimate ability.
Urkt will cast a spell that deals pulsating damage to the raid. To interrupt the ability, one of the players must exit the duck form right next to the boss, after which Urkt’s ability can be interrupted.
Ervinn will also use a powerful AoE on the raid; to knock down the ability, you need to direct Urkt in her direction so that when making his dash he runs through Ervinn, thereby interrupting the skill.
Pip will apply a damage absorbing effect to the raid. It is necessary to get rid of this effect in the allotted time, otherwise an explosion will occur. The best way to do this is to stand in a poisonous puddle for a few seconds.
Larodar, Keeper of the Flame
The battle with Larodar consists of two phases.
Larodar will accumulate energy and, having reached 100 units, will apply a deadly AoE. To avoid death, you need to summon a protective circle and get into it.
First, you must kill the ancient acolytes, then heal them to maximum health, then continue their healing as they saturate the seed in the center of the site.
Then the sprouts will appear, locking onto the target; the sprouts cannot be attacked.
You need to click on the seed in the center of the site and get the ability to exhale the energy of sleep. The cone of this energy must be directed so that it touches the sprout, after which it can be attacked.
After killing a sprout, it needs to be healed to maximum health. And only after that, a protective circle will appear.
The boss will make a dash into the tank, which causes damage to all nearby players; at these moments, the tank must run away from the raid.
Fireballs will also move towards the boss, they must be intercepted and absorbed, preventing them from reaching the boss.
After the boss reaches the maximum energy for the third time, the second phase will begin.
The boss will create entry zones that need to be absorbed and applied to debuff players; players with a debuff must run out of the raid.

The boss will use a frontal attack directed towards the tank; the targets will receive a debuff that does not allow them to heal.
There will also be a small pulsating AoE around the target, which will draw out life when dealing damage – accordingly, the tank must run up to the allies to draw life out of them, and they, in turn, should not run away from the tank.
Nymue, Weaver of the Cycle
Nymue has two alternating phases.
Foggy lines will appear on the floor, imposing a short-term debuff if you step on them. Some combat mechanics will sometimes force players to step on these lines after all.
Poisonous flowers will appear all over the room; players must run into them and stand to absorb this zone.
Poisonous segments/rays will also move from the boss; if they collide with them, the player will take damage and be stunned.
When the boss reaches 100 energy, the second phase begins – the boss becomes immune to damage and summons two powerful minions, killing which will return the boss to phase 1.
The minions appear in opposite parts of the site and in no case can they be led through a foggy line on the floor, so the raid will have to split into 2 groups.
A puddle will appear near the boss; the tank can absorb this puddle to get a buff; the player with the buff leaves behind areas of bloom that allow you to move freely along foggy lines without getting a debuff from them.
Smolderon, the Firelord
Peploron is the first of the three final bosses; the fight with him takes place in two alternating phases.
In the first phase, some players will receive a debuff that deals pulsating damage to nearby allies; they must run away from the raid and maintain their distance.
At the same time, the boss uses an ability in the tank, the damage from which, on the contrary, must be divided. Thus, one half of the raid runs away with debuffs, the other half of the raid helps the tank to share the damage.
Players who share damage with the tank receive a debuff; it will be useful during the second phase.
After accumulating 100 energy, the boss moves to the center of the room and the second phase begins.
The boss will create fire circles around himself, from which you need to run out.
Players with a debuff generate small fire spheres around themselves, which begin to move towards the boss.
The player who spawned the spheres must intercept and absorb them, receiving a buff for each of them, increasing damage and healing.
Tindral Sageswift, Seer of the Flame
There are several phases in combat, accompanied by small transitional phases.
The main mechanic of the boss is to entangle the entire raid with roots. Each entangled player will have a vine, destroying which you can free yourself from entanglement. The raid, accordingly, should be grouped at the boss in order to destroy all the vines with spells with area damage.
Also in the first phase there will be a lot of mechanics that encourage you to get rid of entanglement with roots as quickly as possible: projectiles bombarding the site; a debuff that needs to be dispersed away from the raid and a special blow to the tank, creating an extensive entry zone around it, causing significant damage.
In the second phase, the boss will release projectiles that create seeds upon landing; players must run into the seeds, thereby preventing them from starting to grow; if a tree grows out of the seed, this will mean the death of the entire raid.
In the third phase, players will have to deal with the mechanics of both the first and second phases.
During the transition phase, the boss flies to another area, leaving feathers behind; players can click on the feather to summon a riding dragon and go after the boss.
During the flight, players must dodge fire projectiles and collect emerald spheres that give a buff to healing and damage.
Upon landing, Tyndral will surround himself with a shield and begin to cast a deadly spell; players must manage to destroy the shield and interrupt this spell.
Fyrakk, the Blazing
Since Fyrakk has not been tested on PTR, the short tips are based on the description of Fyrakk’s abilities in the Adventure Magazine.
The fight with Fyrakk takes place in three phases plus one transition; your task is to prevent Fyrakk from burning Amirdrassil.
Phase 1:
Your main task is to protect the roots of Amirdrassil, not allowing the fire to burn them.
The fire in this phase comes from the Firestorm ability, which launches projectiles at random players, creating small fire zones in the landing area.
These entry zones grow over time; this means that the raid should plan where the shells will arrive, and slowly shift the entire raid to the side as the entry zone grows.
Another ability of this phase is the opening of a portal, which attracts players and deals damage throughout the raid; the closer the target is to the portal, the higher the damage.
Tanks must turn the boss away from the raid and change as debuffs accumulate.
A random player will also receive a debuff; after a few seconds, streams of fire will crosswise begin to disperse from the player; he needs to run away from the raid so that it is easier for other players to evade these streams.

The transition phase begins at 70% of health.
Fyrakk receives an absorbing shield and begins to exhale fire in the sector aimed at Amirdrassil.
The shield must be knocked down within 30 seconds.
Purple spheres will also appear on the ground and move in the direction of the boss; players are required to intercept them.
After destroying the shield, phase 2 begins:
During this phase, the raid will need to heal Amirdrassil, however, this is not done directly.
The spirits of nature will appear on the site and move towards the tree; at the moment of contact, Amirdrassil absorbs the essence of the spirit, restoring himself to health equal to the current amount of health of the spirit.
Spirits appear wounded, so healers must actively heal them until they reach the tree.
Infernals will also appear on the site; they must be tanked and killed before they fill their own energy scale (otherwise a fatal explosion will occur).
Fyrakk will soar over the site, making a flight, dealing damage and summoning small minions that deal pulsating damage on the raid. They also need to be killed very quickly, as they will destroy nature spirits if they get too close to them.
After the flight, the Fyrakk lands in the center of the site, causing huge damage to everyone who happened to be nearby.
Upon reaching a certain percentage of health, phase 3 begins:
The essence of the phase is to resist the Roar of the Apocalypse, a powerful spell that can destroy the entire raid if you do not take precautions.
Seeds will appear in the Amirdrassil; players must pick them up and protect them until they are filled with energy; after that, they can be used to give the raid an absorbing shield sufficient to survive the Roar of the apocalypse.
If the player carrying the seed is exposed to any Fyrakk ability, the seed will be saturated with flames and explode, causing huge damage to the raid.
In addition, players will need to dodge tornadoes and the boss’s frontal breathing.
For tanks, the mechanics of changing after the strongest strike on a single target are provided.
Conclusion
In retail WoW you need to do a ton of mechanics in raids. But also you can use our WoW carry service to achieve all of your goals.
More Stories
Explore Nothing2hide .net Gaming: Ultimate Online Experience with Cutting-Edge Features
The Rise of eSports Betting
Level Up Your Play: How No Deposit-Free Spins Are Revolutionizing Online Gaming Experiences